Wednesday, 31 August 2011

No pics. today.

My USB lead is out on loan so I can't post any pictures today. I have been creative in the kitchen and made some crabapple and sloe jelly. I had a few crabapples given to me, then added the meagre crop from our little tree, only planted this Spring, and needed something else to bulk up the quantity. The River Cottage Preserves book gives a recipe for Hedgerow Jelly which uses a half quantity of crabapples and half of any hedgerow berries. I found two sloe bushes only yards from our house, which are laden with wonderful fruits. I have never seen such big sloes - I picked 2lbs in a very short time. I'm sure they are sloes as the leaves look right and I have the scratches from the thorns as additional evidence! They have given the jelly a beautiful rich purple colour and added quite a plummy flavour. I skimmed off the froth and being unable to waste anything I tried it on a piece of bread and butter - delicious and sweeter than I imagined though there is a tang as well. I have never used sloes before and am going to pick some more shortly and make sloe gin for Christmas. There is also a recipe for making thin strips of candied orange peel dipped in chocolate. They sound very good without being too rich or wicked.
I am going to start work on my course today and when the new blog is up and running I will let you know, in case you are interested.
Will September bring us an Indian summer? In case it doesn't, I have taken down our two hanging baskets of cherry tomatoes and put them in the greenhouse in the hope that they will ripen more quickly. Three cherry tomatoes at a time is not enough, even for a small household.

Friday, 26 August 2011

Getting organised.

Some of my time and energy this week has gone into tidying the garden shed and greehouse. On Wednesday I took everything out of both and cleaned the floor areas. It was such a lovely morning I was lulled into a false sense of security, but shortly after lunch my husband said 'I wouldn't leave it too long before putting things back if I were you'. How right he was. I had just about rehoused everything that needed to be kept dry when the heavens opened and I was actually marooned in the shed while the rain hammered down. We had a mini moat round the house for a few hours.
The painted wall and curtains in the shed are reminders of the time when our youngest daughter had it as her haven. She would spend hours up here reading and listening to music. There was no junk stored here then and it looked quite charming with pictures on the walls, etc. Now it has reverted to being a shed and a store for all the flower pots, seed trays and other gardening paraphernalia. The blue china pot is not what it might appear! It used to have a houseplant in it.

The greenhouse is a magnificent 7'x5' - hard to imagine that until yesterday those wooden slatted shelves, now up in the shed, used to be in here too. The green plastic units stood centrally, one on top of the other with the wooden ones on either side. There was scarcely room for plants.

It is right outside the backdoor and had become a real embarrassment in it's previous untidy state. It was all too easy to shove things out of the way in there. We still have to clean the glass and disinfect, then it will be ready for my geraniums to be tucked up for the winter.


I have just enrolled for a two year online course with Distant Stitch - the title is Creative Sketchbooks and will be quite a challenge for me. The main reason for taking the course is to improve my drawing and painting skills but it will also involve photographing my work and probably using Photoshop, as well as setting up a separate blog to show my work. The theme for the first module is fruit and vegetables and as I unpacked the week's shopping yesterday I reached for my camera before putting everything away. I love the colours in the picture above.


I like the slightly soft focus of the above picture, but have to confess I was aiming for a sharper image. I have been collecting images of fruit and vegs from gardening magazines but thought it would be good to have a few photos of my own. I shall need some to play with on Photoshop.


I love the shape of peppers and their highlights and shadows.


It is much easier to photograph them than draw and paint them!


Good enough to eat and a nice variety of textures.

I think I have everything I need for the course and start work on 1st Sept., and if I am brave enough to 'go public' I'll let you know when my new blog is up and running.

So much to do and so much to learn. Lovely!


Monday, 22 August 2011

A bit of doodling.

I have been working into some of my prints using various colouring media. The one above is one of the reverse leaf prints, where I liked what was on the back of the page better than the front. All the prints were made with acrylic paint and on this first one I added a little ochre oil pastel here and there and a wash of Koh-i-noor waterbased dye in blue. I think this is the best of the four.

The second one here had Caran d'Ache water colour crayon added with pencil crayon to bring up a bit of detail.


On no.3, I just used Caran d'Ache crayons as there was quite a lot of colour already on the page from the original print.


This was treated in the same way. The paper was copy paper as advised by Gina - fine for the prints themselves, but it wrinkles when water is added and I'm not even sure it has dried in this last photo! I could have ironed or pressed the pages of course, but am far too impatient to do that.

.

It has been such a lovely day today that I sat in the garden doing these this afternoon. Hope you have had a lovely day too.


Saturday, 20 August 2011

Monoprinting 2.

Very mixed results again. Inspite of choosing what I thought was a feathery leaf for the sample on the left, it has come out as a solid shape as have both the others. Tansy leaf on the left and Alchemilla mollis bottom right, and can't remember top right!

Printing them again using their reverse sides has given a much more interesting result and I quite like these.


This leaf has a more interesting shape but I still like the reverse print best. The leaf is from a Japanese Anemone.

I didn't bother to clean off the roller each time and so some paint was applied to the back of the sheets picking up echoes of the leaf shapes and giving a sort of collage effect. I rather like it. Two for the price of one and if you don't like the main print, the other side of the paper might give a better result.


Another 'back of the paper' print.

.

I have just signed up for an online course with Distant Stitch and will be starting work on 1st September on the Creative Sketchbook course. These prints will come in handy later on in the course when I have to produce work on a designated theme - as long as I choose leaves, of course.


Friday, 19 August 2011

Monoprinting 1.


Here are my attempts at Gina's monoprinting exercise - see her blog 'Fan My Flame'. I jotted down her instructions and was fooled by the seeming simplicity of them into thinking this would be a breeze. In fact, I found it quite difficult and haven't yet produced anything I'm pleased with.

I threw away my first two attempts. I used Galeria acrylic in a tube and that was far too thick. Then I tried Inscribe acrylic in those little bottles but that was too runny. (This sounds a bit like the tale of the three bears!) Then I had a go with an Adirondack acrylic paint dabber and just removed the dabber part to put a blob onto my plate. This worked better but did dry very fast.

I also drew my first two attempts with an old plastic knitting needle but found a biro far easier to use and it gave a better result. The ball point glides over the paper so smoothly.


I seem to have an echo going on here. I don't know how that occurred.

My ghost images are a little too ghostly even though I rubbed my hand over the plate quite firmly each time, and thought there was enough paint on the plate to begin with.

I shall rediscover them up by adding more colour to the background and to my design. To get a good result, I think a lot depends on the paper being used as well as the type of acrylic paint. I enjoyed trying this technique and have pressed several hopefully 'ribby' leaves to try out the next one.


Monday, 15 August 2011

Transfer Paints.

I read an interesting article in Quilting Arts Magazine about using transfer dyes and plant material to create pattern on fabric. The dyes used by the author of the article came in powder form, but I remembered I had some liquid transfer paints tucked away, probably from when I went to college 2o or more years ago! They work in a similar way by being painted onto paper and when dry you place the coloured paper face down onto synthetic fabric and iron until the colour is transferred. I watered mine down as the colours can be very intense and I didn't want that and the fact that I recycled an old cotton/polyester sheet for my fabric probably softened them further.

To create my patterns I had previously picked a few different leaves from the garden and pressed them in a very fat dictionary for a few days. I am very pleased with the clear image of the fern in the picture above. The first example was made using geranium leaves.

This one is not so clear as I sprayed it with Glimmer Mist and have lost the sharpness. The slight orangey tinge to the tips of the fern is due to the fact that I reversed the leaf from the previous sample and some of the colour from that application has adhered to the leaf and transferred itself onto the fabric for this sample.


I sprayed this one as well to get rid of the rather nasty pink I ended up with. I left the leaves in place and sprayed over them.


I mixed the colours slightly on some sheets and quite like the effect. These leaves are from my Goat's Rue plant.


Another Goat's Rue sample. I like the streaky effect of the background and think it would be extremely difficult not to get streaks when brushing the paint onto the paper. The paper absorbs the colour quite fast before you can get another brushful ready to apply.


Ivy leaves this time. If you look carefully you can see where the veins of the leaves have been impressed into the fabric. I don't know how long they will stay like that.


Getting adventurous with colour here, or was I just using up the leftover paint?!


This is almost identical to the first one - I must have liked that arrangement. All I have to do now is decide how to use them.


There may still be unspent colour left on these papers but even if not, I have some rather nice sheets to use for other projects. They might be very useful during the online course I am about to enrol on . I am very attracted to the Creative Sketchbooks course offered by Distant Stitch which was set up by Sian Martin. It will be a double challenge but that will be good for me as I will have to extend my computer knowledge and skills as well as my artistic ones. Scary but good scary!


Sunday, 14 August 2011

The Toll House Gallery, Clevedon.

I did my stint of 'meet the artist' stewarding yesterday with one other member of our group. It was a dull and windy day but we had a steady stream of visitors throughout. They seemed very appreciative of our group's work though none was in the mood for shopping! Here is a small sample of the work exhibited but I think my photos have not done them justice. I didn't bother to take any of my pieces as you have seen them all before - small fabric landscapes with standing stones.


The views from the window were lovely too, even on a dull day. I am not used to looking out onto rocks and water so it was quite a novelty.


I love the textures of the rocks, shingle and seaweed. When the tide had gone out a bit there was sand too.


There is this dinky little pier which was very popular throughout the day. Just a little less breeze and a bit of sun would have made a perfect day for the holidaymakers.


Clevedon is North Somerset and in the far distance just to the right of the pier in the picture above is Newport in South Wales and to the left is Cardiff. The exhibition runs till the end of August and we are on duty again next Sunday. Hope the sun comes out!


Monday, 8 August 2011

Latest sketchbook page and Macro experiments.

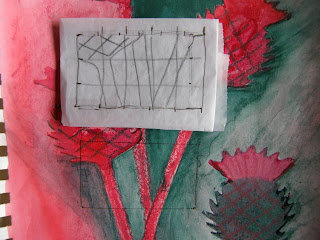
Our latest task was to take a small area of one of our drawings, roughly the same proportions as a page of our sketchbook. We had to trace off the main lines and shapes, enlarge them to fit the page size and try to reproduce the colours of the original drawing. Well I seemed to have boring straight lines everywhere whereas Gina's drawings had lovely curves and sinuous lines - much more interesting. My first attempt was abysmal and is no more. The second attempt is as near as I can get it but still not true. There is too much contrast between the central green area and the darker one to it's left and the crossed lines on the base of the thistle are much too dark but I was afraid of messing it up altogether if I continued to add lighter shades. I found it much harder than I imagined to increase the size and try to replicate the colours.


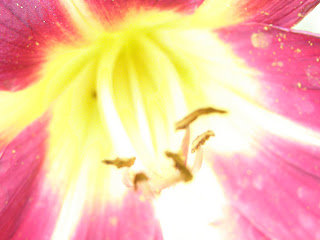
Linda - whose blog is Blue-Eyed Girl - takes wonderful photos using the Macro device on her camera. I knew I had one on mine but had never used it, so decided the time had come to see what it did. These are my first attempts.

Above is the centre of a day lily. I think I need to adjust the amount of light somehow.

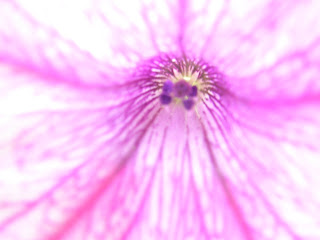
A petunia - also too light.


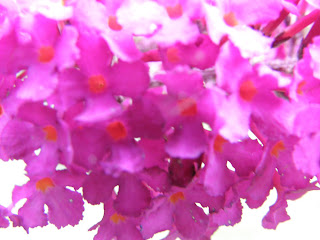
Part of a spray of buddliea - rather blurred but everytime I focussed the breeze moved it. I should have loaded these is the reverse order so they got better as you viewed them! It would be sensible to use the CD that came with the camera and which would give me full instructions - but that is too much to ask!


Saturday, 6 August 2011

More Sketchbook.

I thought I should do a bit more work on my sketchbook pages or I'll get left behind, and it is only now that I can see in the picture above that I should have continued the darker area further to the left. It ends too abruptly like this. I had originally thought it was too dark in the centre so wet the page again and blotted some of the colour away. Then I changed my mind a added more dark colour and I think I have overworked it.

I've almost done the same in this one but it isn't quite so obvious. I had great fun scribbling the colour on with water soluble crayons and then activating it with water. Where it became too dark I could blot it away with a dab of kitchen roll. I added definition here and there with various pencils, and drawing pens.


I treated this page in the same rather random way and feel that I am not really in control of what happens on the page. I just go along with it, hoping for the best! In fairness to myself, these pages look better in reality than they do here and at least I have learned what doesn't work and have enjoyed doing these exercises.